
 Redstone Piston Counter + 7 Segment Display"/>
This manual describes how to build a Redstone Piston Counter with a 7 segment display.
This Redstone construction can be extended at will.
The Redstone Counter works almost exclusively with pistons and has, in contrast to counters that do not work with pistons, the advantage that - used correctly - it makes no mistakes.
Instructions:
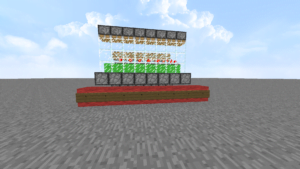
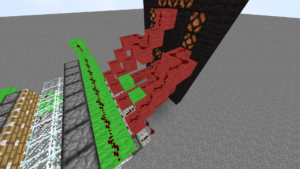
The first thing you do is build this glass structure: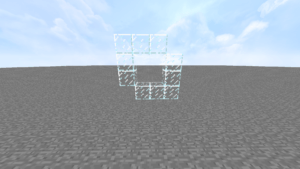 Here to illustrate the height and width:
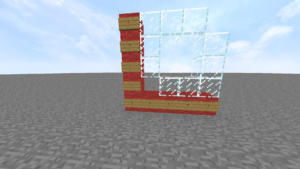 Two blocks go into it. In this case light green wool on which you put a redstone torch and an amplifier.
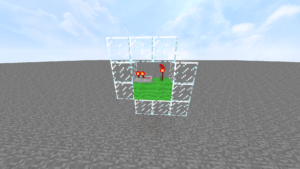 Then normal pistons come into this position:
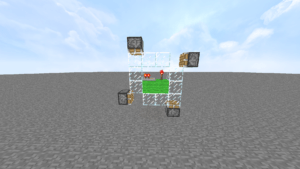 Directly behind you do the same until you have reached a length of 8 blocks
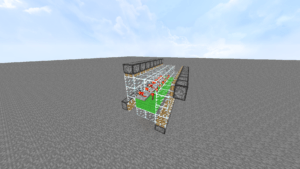
 At the end you swap the position of the redstone flare and the amplifier, so that it now points exactly in the other direction.
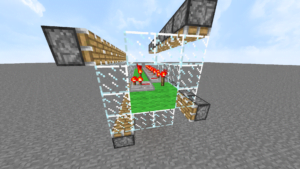 Note the side you started with as the front side. Now you put a row of light green wool under the pistons on the bottom left.
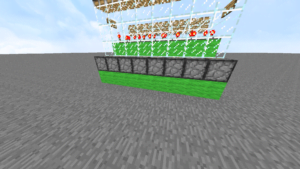 Before that now come amplifiers at level 1, which you connect to Redstone
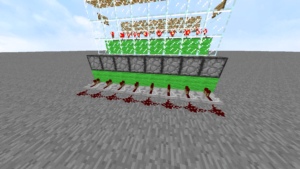 Now place a row of light green wool in front of the pistons in the upper left corner.
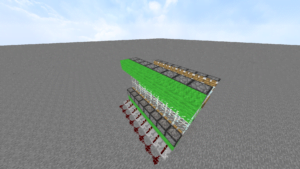 This series is extended with two further blocks
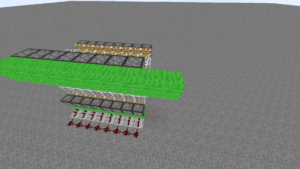 At the end you put a block on top of it and move down a row
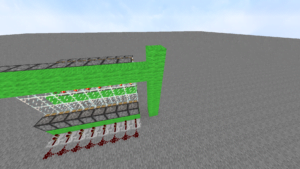 Now every second block must be removed
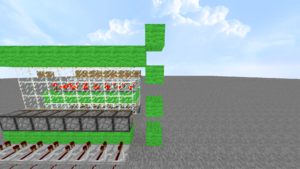 That's where you put redstone flares
 and a redstone flare on the top left of the block...
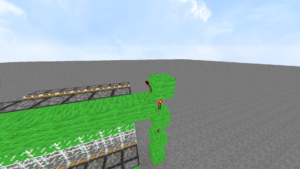 Now draw a row with redstone to connect the pistons to it
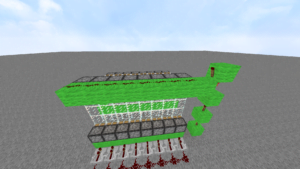 Below remove the two rows of glass once again
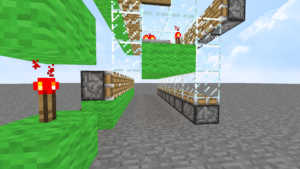 Then equip the pistons again with amplifiers and connect them with Redstone
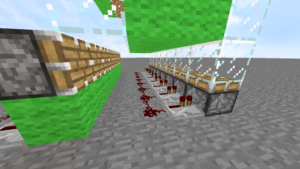 Now the other upper row. Here you draw again a row with blocks but let them overlap with a block
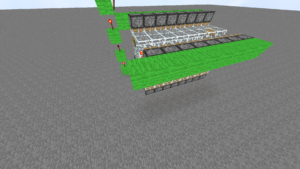 Two blocks below that comes another block
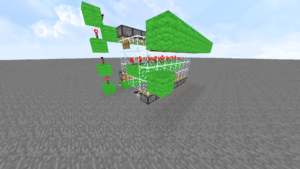 Then you go down one block, but leave it free and build these two blocks next to it like this
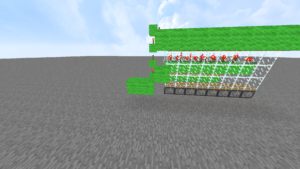 And another block on the floor
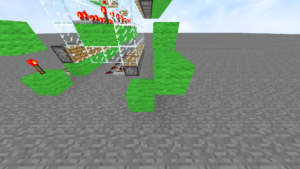 Then you put a redstone flare at the top and one below it
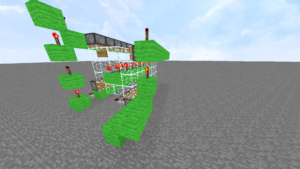 The whole one connects again with a series Redstone
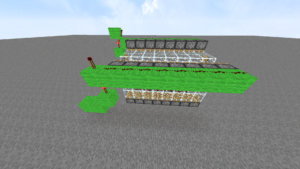 In front of the lower flare you put an amplifier on level 4, pull a redstone track down and two more blocks long to the back
 Now 4 amplifiers at level 4 are connected to the first track at the bottom left.
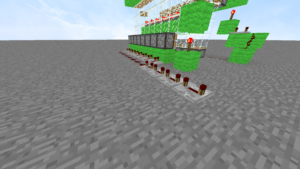 Right next to it in front of the block with the redstone torch is an amplifier on level 1 and behind it once redstone.
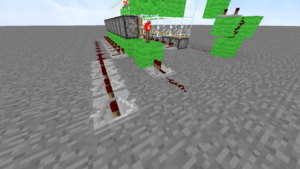 On the next track there is first a redstone, then an amplifier on level 1 and another redstone
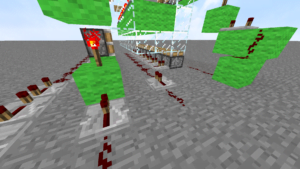 The whole thing is now connected like this:
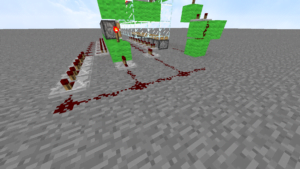 Now comes the last track, which connects with 4 amplifiers at level 4 like this:
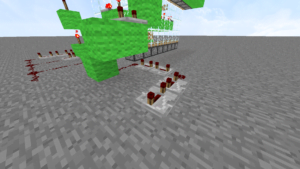 Now you can also connect the last track with the other 3
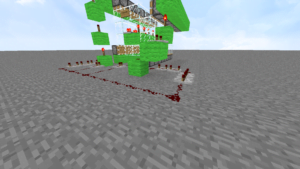 Since the construction may only receive a short signal, an input delay is built.
First you put two blocks at the input
Since the construction may only receive a short signal, an input delay is built.
First you put two blocks at the input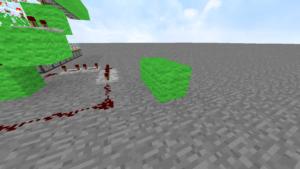 right next to it in the ground come 2x2 blocks
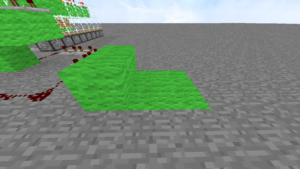 Then an amp at level 4 goes on the front block and redstone like this:
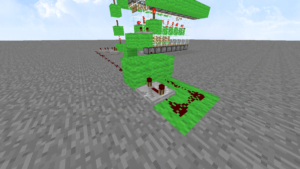 Cut the input once so that a signal does not already come in now
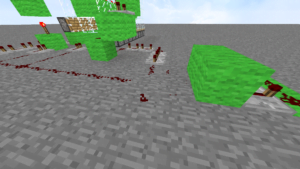 Then place two redstone flares like this
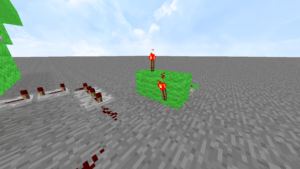 And once again Redstone on it
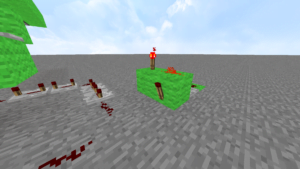 Now put the just removed Redstone back on it
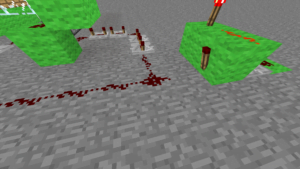 Now you need a block with a push button to "encode" the display later.
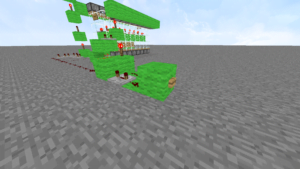 Now it's time for the display. To do this, go to the back of the construction and place a block 7 blocks away from it.
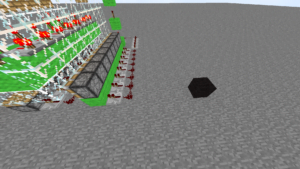
 Starting from the block, draw a row with a length of 8 blocks
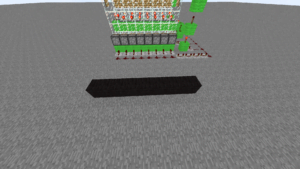 Remove the leftmost block, so that you have a row of 7 blocks again.
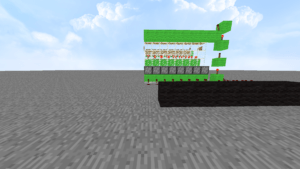 In the middle of the row come 3 Redstone lamps
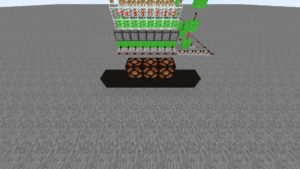 Then pull up a row at the ends with a total length of 5 blocks
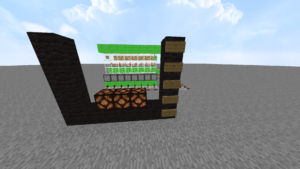 On the left and on the right there are also 3 redstone lamps.
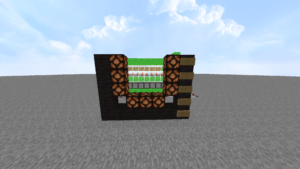 And over it in the middle again 3
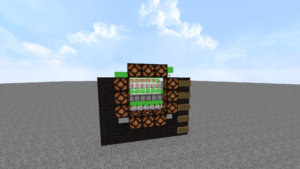 Now extend the rows on the left and right to a height of 9
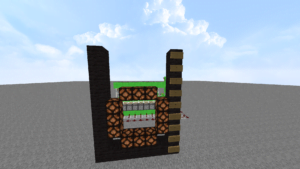 Left and right again 3 Redstone lamps each
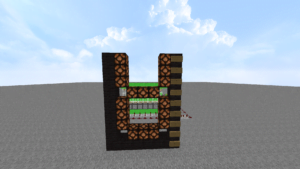 And on top again 3
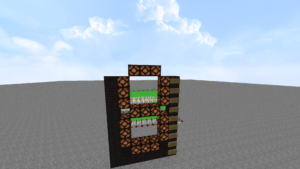 Now pull the whole thing up to a height of 11 blocks and put a row on top.
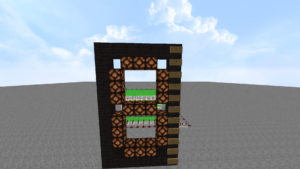 Now you can fill in all the remaining gaps
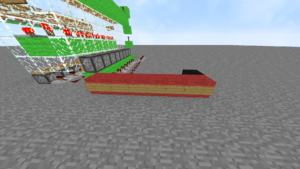
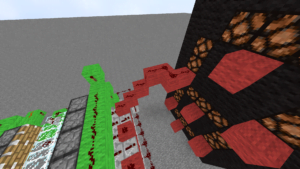
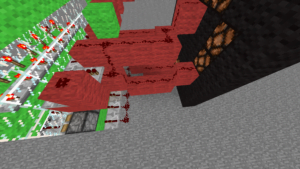
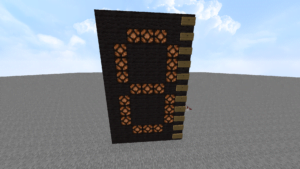 Now you put red wool directly behind the pistons. To all but the leftmost
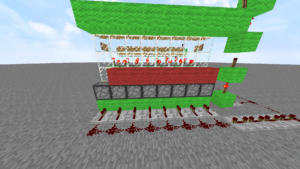 Then more blocks are added to it so that it looks like a fork.
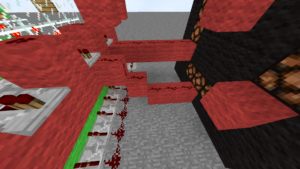
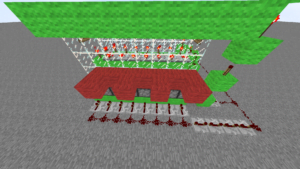 On top of these blocks now comes another block
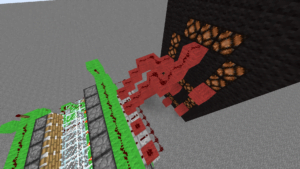
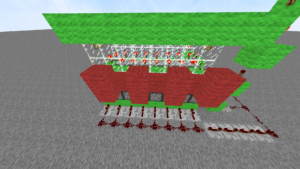 And the spaces are half filled
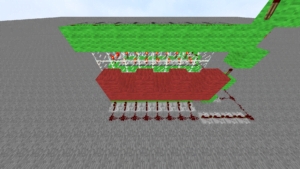 Now amplifiers come on level 1 starting from the glass so on the blocks
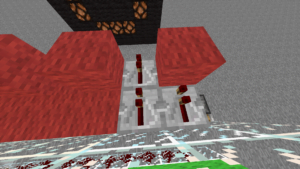 And that with all blocks
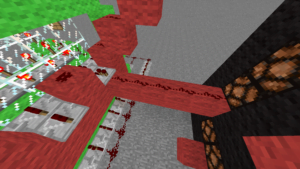
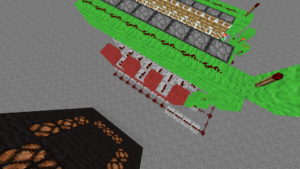 On the remaining blocks comes then once Redstone
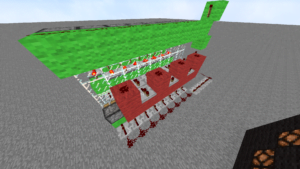 Now mark these places on the display
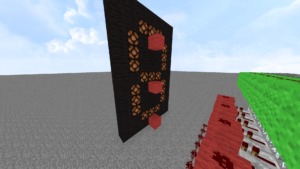 The middle redstone lamp must always be powered up, so that all 3 light up at the end.
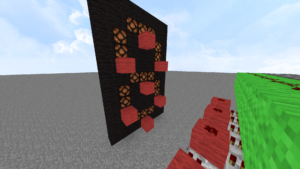 Now you can connect the whole thing. It doesn't matter how you connect it, the main thing is that the wires do not connect each other.
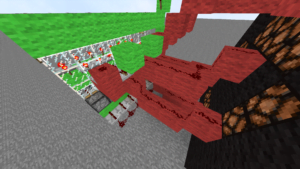
 When everything is connected, a block for the "zero point" is inserted here.
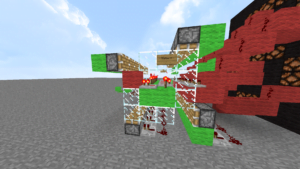 This "zero point" is used to output a signal at every 10th input. That means, the counter counts from 1-9 and at 0 it sends a signal, which can be used for a second counter next to it, which then shows the 10 numbers. Important here is the input delay, because otherwise the next counter gets a permanent signal, which leads to errors.
With the zero point it is also important that the signal from the block is first passed on with an amplifier at level 1, so that the piston above does not get a signal through it.
This "zero point" is used to output a signal at every 10th input. That means, the counter counts from 1-9 and at 0 it sends a signal, which can be used for a second counter next to it, which then shows the 10 numbers. Important here is the input delay, because otherwise the next counter gets a permanent signal, which leads to errors.
With the zero point it is also important that the signal from the block is first passed on with an amplifier at level 1, so that the piston above does not get a signal through it.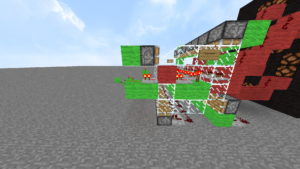 Now it goes to the "Encoden". You start at 0 by replacing the glass blocks with other conductive blocks, in this case blue wool. So you look exactly where the leads go and set the blocks accordingly so that the display shows a 0. So all blocks in the row except the middle must be replaced.
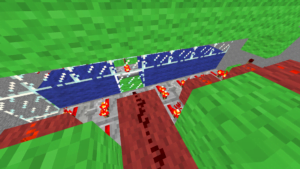 And very important: Always check!
When the 0 is finished you go to the button and press it once. The blocks are now transported in a circle by the pistons one row further. Then comes the 1. and you do the whole thing up to the 9 and press the button again so that the counter is back in the starting position.
Then comes the last step.
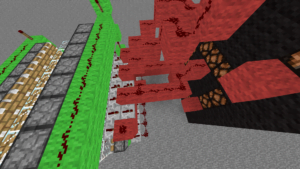
It can happen that if a signal comes in too fast one after the other, that the glass blocks and the wool in between are pushed out of the circle. Then you would have to remove them all, put in new glass blocks and encode everything again. To prevent this, the construction is now secured with obsidian blocks.
And very important: Always check!
When the 0 is finished you go to the button and press it once. The blocks are now transported in a circle by the pistons one row further. Then comes the 1. and you do the whole thing up to the 9 and press the button again so that the counter is back in the starting position.
Then comes the last step.
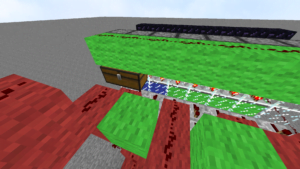
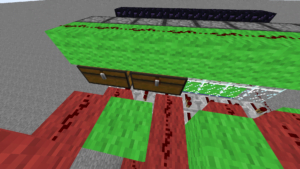
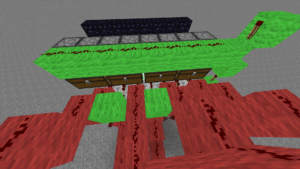
It can happen that if a signal comes in too fast one after the other, that the glass blocks and the wool in between are pushed out of the circle. Then you would have to remove them all, put in new glass blocks and encode everything again. To prevent this, the construction is now secured with obsidian blocks.


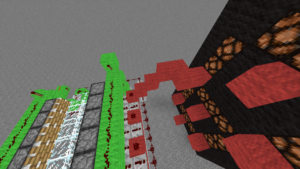
 Where the signal goes out to the display you have to secure the construction with normal chests and redstone chests, because obsidian blocks conduct redstone signals. To do this, simply alternate normal and redstone chests.
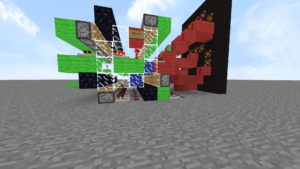
 Now the counter with display can be used.


Wow!!! Very detailed instructions and good idea!
I've looked at a lot of build ideas, but they were a lot less detailed than this one. I'm going to build myself a clock from this.
Do you know how to connect the motors so that when one number reads zero again, the other number reads one?
I didn't read through the instructions that well and have now figured out the answer on my own!
Super good idea! when I saw the instructions for the first time, it almost knocked me off my chair. so long! and so rich in detail! I will rebuild!
LIKE
So you sit on the chair while surfing the internet. I lie on the bed.
10 out of 5 points
I ha e rebuilt it the same way but nothing works for me